After suggesting I would build these shelves directly onto the guestroom walls, my brother, Brek, talked me out of it. He convinced me that building them using separate carcases that would later fit together was the way to go. This also solved another of my problems. Since the ceiling height is greater than 8 feet, I couldn't figure out how to get my plywood verticals to go from floor to ceiling. Both Brek and my Dad also believed the right design would include building a back onto the shelves instead of using the existing plaster wall. A plywood back would hide the plaster wall's imperfections.
So I decided to use a 1/4 birch plywood backing, 3/4 plywood verticals and shelves, with 1 x 2 poplar facing. I started with the bottom carcase that would fit under the window. The window, of course was not level so I used a chisel to square up the window trim with the shelf carcase. Rather than losing the existing wall outlet, I moved it into the shelf and added another electrical run for later use in another part of the shelf system. I used shims to compensate for the sloped floor (i.e., whoever finished the oak floor prior to us buying the house did not sand down the outside edges as much as the visible portion).
I decided not to build carcases for the shelves that would surround the window. There were so many dimension dependencies I could have messed up here so instead of carcases, I just attach the verticals to the backer and then shifted the verticals into the exact position once I placed them on the bottom carcase. I'll make the shelves later and slide them into the dado slots.
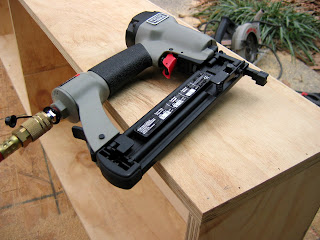
I used my brad nailer to hold all my joints while the glue dried. I built two more carcases for the top because it spanned more than eight feet. These just barely fit. I got extremely lucky. A problem I didn't account for was the sag in the ceiling. It didn't become apparent until I tried to slide the top carcases into place. The only way I could fit the top right carcase in was to slide it from the left, which was not fun considering I was supporting the weight of it in my arms as I climbed a step ladder. I believe it may be pushing the plaster ceiling up by a 1/16" if possible. In hindsight, I could have gotten away with making these top carcases about an inch short and just covering the gap with molding. Oh well. That's what I'll do for the other shelf sections.
Tuesday, January 09, 2007
Building the First Shelf Wall
Posted by
Eric Jacobson
at
4:11 PM
![]()
![]()
Labels: Renovation
Subscribe to:
Post Comments (Atom)


0 comments:
Post a Comment