
What's the best solution to the problem presented by a window in a shower? Replace the window with glass block. At least, that seems to be what everybody does these days. Instead of researching all the companies that make these glass block kits, we just went with Pittsburgh Corning Glass Block, which is what Lowe's carries. Despite the flashy website, I hate this company's kit. For example, instead of making the various spacers one needs, they give you a generic spacer and explain that you need to make the spacers you'll need by cutting their spacers up and filing them down. Trust me, it's a real pain in the ass!
I spent most of a day framing out the new rough opening per Pittsburgh Corning's specs, according to our plan. Melissa spent a good portion of the day making the stupid glass block spacers and buying other Pittsburgh Corning accessories. At the end of the day I finished my rough opening, Melissa primed it, and we added the plastic channels (breaking one in the process). Again, Pittsburgh Corning's steps suck. They wanted us to rip one of the channels in half (lengthwise) with an exacto blade. Yeah, right. I would like to see an exacto blade that could score this thing enough to rip it. Ours certainly didn't work. A final measurement revealed I was 1/2" short on my height. Oh well. I was done for the day. It would have to work.
The next day we painted the channel screw heads white so they wouldn't show through the glass. And now we were ready to mix the mortar. I hated every bit of this project, especially mixing the mortar...with a piece of wood. Buttering up the glass block sucked even worse than I expected. The mortar wouldn't stick to the glass, so we could only pack it on with our hands. The more we worked, the more mortar slid off our glass block and fell all over the place. Complicating matters was the fact that the outside of the window was above a basement stairwell. So one of us had to be on a ladder on the other side of the window trying to catch mortar and shove it back in. After lots of cursing we managed to fit the last of the glass block in place. We spent the rest of the day messing with the mortar and trying to clean the glass. In the end, I'm sure it will be beautiful. But I sure hated doing it!

Sunday, January 13, 2008
Bathroom Renovation #2 - The Damn Glass Block Window


Bathroom Renovation #2 - Bondo
The obvious way to deal with rotten wood is to replace it. But sometimes that's easier said than done. For example, as I began pulling out rotten studs I discovered what must have been a window leak in the old shower (below bottom left corner of pictured window). There was an obvious trail of rotten wood behind four side-by-side studs I had to replace. But these newly revealed rotten boards were the planks that make up the external wall and the exterior siding planks were nailed in part to said rotten planks. Thus, replacing said rotten planks would involve taking off a chunk of the siding.
Since the planks were in excellent condition except for the leak trail, I decided to repair them instead of replace them. First, I attacked the rot with a hammer claw, removing all the rotten wood. Second, Melissa saturated the areas with Minwax High Performance Wood Hardener (which turns the wood a dark wet color as shown in the above picture). Third, I rebuilt the original wood with Bondo, which is a less expensive version of Minwax High Performance Wood Filler.
Roof Leak Near Chimney
Every time I clear the gutters I make a point to remove the leaves that build up behind our chimney. We have a steep roof valley that directs water and debris to a spot directly behind a granite chimney in front of our house. After lots of rain I've noticed water pooling up behind the chimney but I figured, surely whoever did the roof put adequate flashing below all the tar and calk around the chimney. At least that's what I thought until Melissa pointed out a ceiling leak...that happened to be right below where I always notice water pooling.
So after Googling roof leaks around chimneys and staring at my problem spot for 30 minutes I decided this one was way out of my league.
The home's previous owner left behind a substantial amount of paper work on the home so I was able to find the number of the guy who put the roof on. I figured I would start with him, hoping he would honor his work, and fix the problem. He remembered the house and explained that the previous owner refused to pay the extra money to add the cricket behind the chimney and opted to find his own solution. Anyway, the roofer was cool, gave me a decent price, a five year guarantee on his work, and had the same shingles in stock (so the cricket would match the rest of my roof).
When he was done I climbed up to examine his work and enjoy my new cricket and flashing.
Sunday, January 06, 2008
Bathroom Renovation #2 - Under the Tile Walls?
I didn't know what we would find under the tiled walls. After what I saw under the tile floor, the was expecting the worst. We found both good and bad. The good was that for the most part the structure was in good shape. We even discovered three vertical 4 x 6" posts, which I thought was cool. The bad was the rotten wood we found below the window where the tub/shower used to be. It would all have to be replaced. To complicate things, the outside wall of the house was nailed to these rotten studs and cripple studs. I knew I would have to remove the original plaster around the window to see the fill extent of the damage. Fun fun fun!
 As I continued to demo the window area, Melissa washed down the studs we would keep with a watered down bleach solution in case we had any mildew/mold anywhere.
Bathroom Renovation #2 - More Concrete!
Next, we had to tear out the wall tile that surrounded the entire bathroom. Sounds easy enough, right? Of course not. This tile was attached to 1" thick concrete that was attached to a wire mesh. Once again Branden's hammer drill saved the day. After another day beneath face masks and at least 50 more crate loads of concrete, we finally had most of the nasty stuff out for good. Now I'm just wondering if we should have rented that roll-away dumpster Melissa wanted.
Monday, December 31, 2007
Bathroom Renovation #2 - Rebuilding The Floor
As we removed the concrete and the planks between the joists supporting it, we couldn't believe what we saw. How was this bathroom floor and all its weight being supported? The joists were completely rotten except the bottom inch or so. In fact, one of them fell on its own once the concrete was removed. We were hoping we would only have to sister one or two of the joists and the rest would be fine. Instead, we knew we would have to replace all the joists. It was weird walking into the basement and looking up through a large hole into our old bathroom.
 The job wouldn't have been so bad if it wasn't for all the cast iron plumbing, electrical, and other spaghetti hanging from the old joists. We had to support everything from below as we removed the old joists and made the new ones. This also meant we had to weave our bodies around all these pipes as we worked. Pain in the ass! Two days later we had our new floor.


Bathroom Renovation #2 - Concrete Removal
After our Christmas vacation we arrived home with Bob as planned. We used my friend Branden's hammer drill with it's spade bit and broke up the concrete between the joists. What a back breaker! The concrete was about 6 inches thick, super heavy, and required constant trips outside to a pile we started...
 Cutting through the ceramic tile was scary as the pieces flew like broken glass. After a while, the concrete dust was ridiculous. The basement floor, looking through what used to be the bathroom floor, looked like the surface of the moon, covered with concrete debris. Eventually we removed the last of it.
Bathroom Renovation #2 - The Concrete Decision
Once the tub was removed I noticed a split in the concrete slab that had been poured between the bathroom floor joists. The split allowed me to shove a crowbar between the layers and I began ripping up a 1.5 inch deep layer of concrete the ceramic tile was attached to... Now I could finally start to see what we were dealing with. Below the 1.5 inch concrete layer was about 4.5 more inches of concrete. But worse yet, the joists surrounding the concrete appeared completely rotten from nearly a century of concrete moisture. Sensing I was way over my head in this project, Melissa and I began posting questions on Do It Yourself forums. I marked up the following picture (looking up at the bathroom floor from our basement) to help describe our bathroom floor construction to the various contractors that would hopefully respond to our questions.
 In addition to the concrete and rotten joists, we also found rotten wood all around the plumbing side of the tub we removed.
 Most of the responses to our DIY posts recommended removing all concrete to get the weight off our poor house and to allow us to create a stable, solid, flat floor. So we abandoned our previous plan of using self leveling compound to fix the sagging, cracked concrete floor and decided to remove the concrete.
I knew hiring contractors to do this would be expensive and take a while to find good ones. I also have a hard time trusting contractors and sometimes feel they don't respect the rest of the house. I suggested to Melissa that we drive her dad, Bob, down with us from Ohio after our Christmas visit (and fly him back several days later).
We've worked several projects in the past with Bob, including building a backyard storage shed and pergola. Bob tends to work quickly and figure out complicated construction solutions with sound knowledge and he typically does it without overspending on materials. We called Bob, showed him the pictures of our bathroom problems, and he agreed to offer his help.
Sunday, December 30, 2007
Bathroom Renovation #2 - The Cast Iron Tub
The first thing we had to do was remove the cast iron tub. It was in bad shape and had already been re-glazed at least once. On the advice of my friend, Al Hess, I took a sledgehammer to it and broke it into pieces Melissa and I could manage. The first attempt proved it was not going to be as easy as I hoped...

Tuesday, December 18, 2007
Mahogany Vanity Finish
A long time ago my dad recommended using Minwax's Wipe-On Poly, mainly because it eliminated the worry of brush marks. But for this project I figured I was ready for something more ambitious. I picked up a copy of Bob Flexner's Understanding Wood Finishing book in search of a better finish. I convinced myself I wanted to fill the pores of my mahogany with colored paste wood filler to bring out the grain and provide a smooth finish, give it a wash coat, then brush on a polyurethane finish. But after experimenting on some scraps with the paste wood filler I quickly bought a bottle of good old Minwax Wipe-On Poly and gave up most everything Flexner had taught me. Oh well. I'm definitely an amateur. As easy as Minwax makes it, I still hate finishing. In order to protect the mahogany from the bathroom's wet environment, I wiped on seven coats, including sanding with 220 grit between the first three coats. The first three sanding sessions were aimed at filling the pores with the wipe-on poly. Flexner said this would work. I sanded the final coat down to 1500 grit using mineral spirits to keep the polyurethane from clogging the fine paper. I guess it worked. Man do I hate finishing. What are you doing this weekend, Eric? Sanding and varnishing...again!
Thursday, December 06, 2007
Mahogany Vanity Construction
Next, I researched types of wood and decided on African Mahogany for its water durability, color, availability, and price. After much agony and decisiveness, I picked up a piece of 1.5” and a longer piece of ¾” Mahogany and here is what I came up with…
I routed out tongues around the edges of panels…

…and grooves on the edges of frame pieces…

…I abandoned my usually pocket hole joinery technique and bumped it up a notch in join strength and cosmetics by using the BeadLock System to create mortise and floating tenon joints. I was heavily influenced by test results in a Fine Woodworking book that indicated mortise and floating tenon joints were the best mixture of strength and ease of construction.
In the end I decided I didn’t like the system because it depended on too much eyeballing pencil lines and it was nearly impossible to clamp the jig tight enough to keep it from moving while drilling. However, it did allow me to adapt it to many different wood widths…


Monday, May 14, 2007
Shelves (and guest room) Completed!

Wednesday, March 21, 2007
Cutting the Glass

Melissa and I went back to Armstrong Glass in Kennesaw, GA and picked out some neat glass with swirls of green, white, and brown. We picked colors to match the room, which we will paint dark brown, and the rest of the house, which has earthly colors.
Getting the 3/8" glass sheets home without breaking was the first challenge. The second was cutting it. I used my T-square, clamps, and an oil-filled glass cutter. Cutting glass is scary. It's as if some instinct holds you back, telling you not to attempt to break the glass. But even though my hands would not stop shaking, I managed to cut 5 perfect glass panels for my cabinet doors.

Later, after priming, painting, wood filling, and lots of sanding, I added the hardware and 3/8 square dowels using my brad nailer. Without the brad nailer it would have been impossible to nail the 3/8 square dowels without splitting them or breaking the glass.
Starting the Cabinet Doors

I built the 5 cabinet doors using 1 X 3 poplar frames joined using half-laps. On my last project, I embedded a glass panel in a slot within the frame. Brek suggested building the door more like a picture frame so the glass could be replaced if broken, without rebuilding the entire frame. His advice on holding the glass in the frame was to use square dowels. I managed to find some 3/8" poplar square dowels at Lowes so I decided to use Brek's suggestions.
Finding a way to glue up the cabinet door frames and keep the door perfectly flat is always a challenge for me. The flattest thing I could find was an extra 3/4 plywood sheet I plan to return. I used sheets of paper as protection against glue attaching itself to the plywood. To hold the frame pieces flat I used my boat battery on some scrap wood (see photo above). The end result was excellent, my best yet!
Monday, February 26, 2007
Second Shelf Wall and Corner

After lots of research on dealing with inside corners of shelves, I decided on the method seen in the picture above. I picked it because it seems to make the best use of space. Melissa thinks cabinet doors for most of the corner shelves will be useful because we'll probably use them for linens and other random stuff. I agree. Now I just have to figure out how to frame out a space to attach hinges...not fun.
I used nailers in the plaster walls on the corners and on each of the surrounding shelves. The nailers on the surrounding shelves will easily hold the weight. I skipped the plywood backing for the corner shelves because it would have been too difficult to try to fit it in there properly...also because I ran out of 1/4" plywood. Once we paint it and cover most of the corner shelves with cabinet doors, nobody will care.
I used 1 X 2 popular as the face over all the exposed plywood edges. It will help prevent shelf sag on some of the longer spans. It also allowed me to get away with Brek's adjoining carcase suggestion.
I went a little crazy with the nail gun while attaching the face pieces. The darn thing is so fun, I just got careless and several of the nails went in crooked and came back out in wrong places. I'll pull these nails through with plyers and patch the damage with wood putty...the joy of paint grade projects.
Tuesday, January 09, 2007
Building the First Shelf Wall
After suggesting I would build these shelves directly onto the guestroom walls, my brother, Brek, talked me out of it. He convinced me that building them using separate carcases that would later fit together was the way to go. This also solved another of my problems. Since the ceiling height is greater than 8 feet, I couldn't figure out how to get my plywood verticals to go from floor to ceiling. Both Brek and my Dad also believed the right design would include building a back onto the shelves instead of using the existing plaster wall. A plywood back would hide the plaster wall's imperfections.
So I decided to use a 1/4 birch plywood backing, 3/4 plywood verticals and shelves, with 1 x 2 poplar facing. I started with the bottom carcase that would fit under the window. The window, of course was not level so I used a chisel to square up the window trim with the shelf carcase. Rather than losing the existing wall outlet, I moved it into the shelf and added another electrical run for later use in another part of the shelf system. I used shims to compensate for the sloped floor (i.e., whoever finished the oak floor prior to us buying the house did not sand down the outside edges as much as the visible portion).
I decided not to build carcases for the shelves that would surround the window. There were so many dimension dependencies I could have messed up here so instead of carcases, I just attach the verticals to the backer and then shifted the verticals into the exact position once I placed them on the bottom carcase. I'll make the shelves later and slide them into the dado slots.
I used my brad nailer to hold all my joints while the glue dried. I built two more carcases for the top because it spanned more than eight feet. These just barely fit. I got extremely lucky. A problem I didn't account for was the sag in the ceiling. It didn't become apparent until I tried to slide the top carcases into place. The only way I could fit the top right carcase in was to slide it from the left, which was not fun considering I was supporting the weight of it in my arms as I climbed a step ladder. I believe it may be pushing the plaster ceiling up by a 1/16" if possible. In hindsight, I could have gotten away with making these top carcases about an inch short and just covering the gap with molding. Oh well. That's what I'll do for the other shelf sections.
Sunday, January 07, 2007
Preparing The Room
I decided to only remove the trim for the sections of the wall where the shelves would fit. I used a lot of patience and a flush cut saw with teeth all the way to the end of the blade. Here is the picture molding cut...


Designing With Google SketchUp
In the past, I typically approached project design by messing with scraps of wood out in my garage. I would hold them together and imagine potential joinery. Then I would start the projects using some basic design ideas and the rest of the design would fall into place as a kind of problem solving exercise.
This time, I stumbled onto Google's free 3D modeling program, Google SketchUp.
After the 5 minute tutorial I was hooked and I managed to spend about 2 days messing with my built-in shelf design. Although, it was frusterating to waste so much time messing with the 3D design, I flushed out quite a few bad ideas and narrowed my design down to something like this for now.
Tuesday, January 02, 2007
Mission #2: The Bookshelf
Ever since moving into our house two years ago, most of our books have been sitting in boxes in the guestroom. Our house has great storage space but no book shelves! This is a huge problem for Melissa and I because we have a large number of reference-type books that we reference often.
The solution is obvious. Make some book shelves. However, I've been dragging my feet on this project because I haven't been able to determine which wall to sacrifice. Every wall seems to have a good reason why it isn't bookshelf suitable (air intake/vent, window, old wood paneling I don't want to cover, closet doors).
Well, we finally came up with a plan that we both agreed on. I will build book shelves in the downstairs guestroom on two walls. I'll build them around a closet door, window, and corner. We think this approach will give us enough shelf space for most of our books/magazines without interfering with the guestroom furniture.
Here is the before picture.

Sunday, August 06, 2006
Project Completion!

Okay, the moment of truth. Melissa and I carried the finished cabinet up to its new home, the corner of our renovated bathroom. It fit fine but we had to shim up the legs a little to steady the wobbling.
I guess now I just sit back and hope the humidity change won’t mess up all the joins. Yikes.
What’s next? Hmmmm. Maybe some book shelves so we can finally unpack all those boxes of books in the guest room.
Hardware
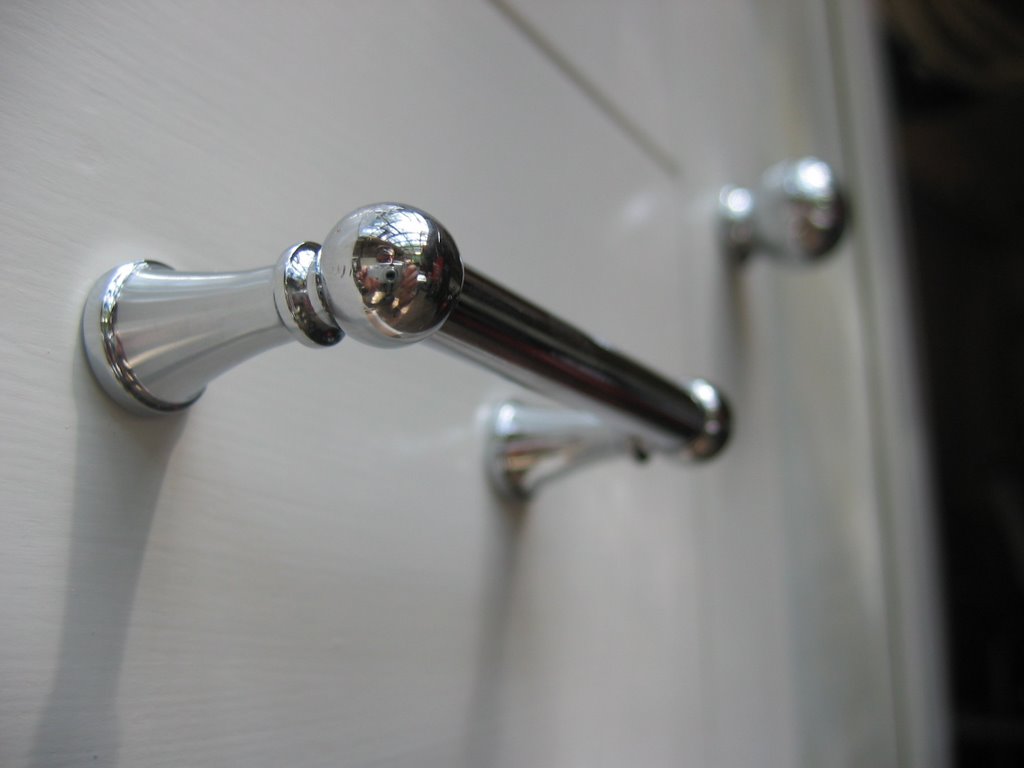
I keep telling myself not to go to Restoration Hardware but I always do. Lowes, Home Depot, and Ace never seem to have anything unique but classy. We decided on chrome to match the other bathroom fixtures and picked out some vintage looking pulls and a knob. Similar to my other experiences at Restoration Hardware, when I was ready to install the hardware, I took a good look at it and noticed that they had once again given me the right pieces but with a variety of finishes. Those bozos have done this to me before. Apparently they expensive prices do not reflect any high degree of quality control.
Melissa went back to exchange the pieces as I went to Lowes to buy the correct length screws. Soon after she returned, I screwed them on and decided it was time to lug the thing up the bathroom...finally.
By the way, if you enlarge the above picture, you'll see my reflection. Pretty cool, huh?
Finish Work

Luckily, Melissa is a good painter and doesn’t mind the work. After some sanding, she taped up the cabinet and primed it with some Zinser 1-2-3, sanded some more with 320 grit, then painted the final 2 coats using some glossy white stuff we used for our bathroom trim.
It's always tough to decide how much to care about the cosmetics of furniture parts that rarely get seen (e.g., drawer backs, bottoms of stuff). We decided not to paint some of these parts. We also decided to polyurethane the inside of the cabinet and drawers instead of painting. Partly because it would be easier and partly for style. I get kind of sad seeing the wood covered up forever with paint. So at least we can enjoy the wood when we open the cabinet door or drawers.
Sunday, July 09, 2006
The Dreaded Hinges
I hate hinges. No matter how accurately I measure, the hinges never seem to attach the door exactly where I want it.
In the past, I've always been too scared to use fully concealed hinges because it takes too much work to cut out the ridiculous slots required to embed the hinge in. However, I managed to find a self-closing, half overlay, Euro hinge for faceframeless cabinets that did not require any fancy slot cutting. I used the instructions that came with the hinge and took my time with the measurements. The best part about most of these Euro hinges is they have a mixture of oval and round screw holes. If you start by screwing in the oval holes, you can hold it together well enough to make minor adjustments. I borrowed from my dad's nickel trick to space the gaps around the door and in the end...I got lucky. The damn thing fits perfectly when closed!
I had planned on removing the hinges prior to priming and painting but forget it. I don’t want to touch these babies. Better to spend an hour taping the hinge or painting around it than to risk stripping the screw holes or messing with the alignment.
After attaching the door, I patched a couple cracks with wood putty and sanded most of the cabinet.
At one point in my brother’s furniture building career, he refused to use sandpaper because he believed even the finest grit could not compete with his perfectly tuned scrapers and blades. This blew my mind. I love sandpaper! I love running my finger across wood freshly sanded with 220 grit. Nothing beats it.
Wednesday, July 05, 2006
Attaching the Legs
The first major disappointment on the project came after I attached the legs.
Attaching them was simple. I had planned the carcase with the legs in mind. My main goal was to be able to put this cabinet in my bathroom corner as close to the wall as possible. Therefore, I wanted the footprint of the legs to be smaller than that of the carcase (to handle the bathroom's base molding). The legs attached nicely with pocket hole screws and glue.
Before stepping back to take a good look, I called Melissa out to observe this milestone. Her reaction was basically, "Why did you attach the legs upside down?". As soon as she said it, I knew she was right. My decision to borrow stylistic ideas, from the cabinet legs my brother, Brek builds, was a poor one. Obviously, I don't get it.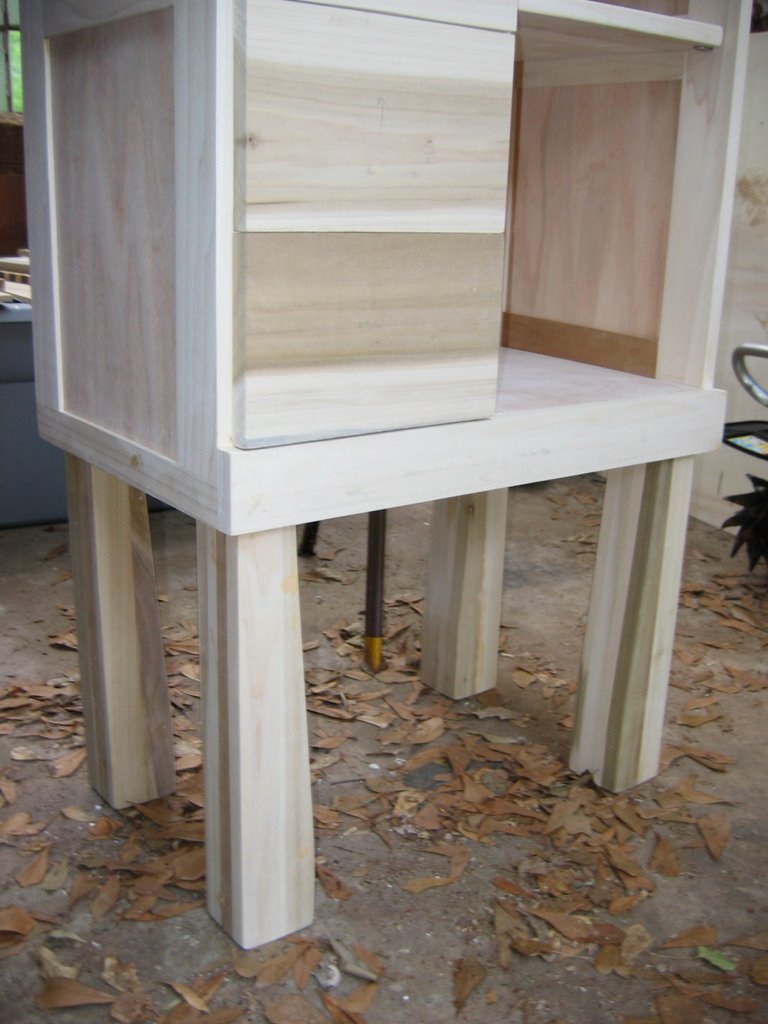
Oh well. We decided too wait until it's painted before chopping off the legs. Who knows, maybe it will grow on us.
The Cabinet Door
On our honey moon, Melissa and I visited my friend Adrian, in Rome, Italy. The door to his bathroom had a textured glass window. You could see through...but not really. Ever since then, Melissa has noticed interesting glass windows. She suggested adding such a window to this bathroom cabinet. After visiting a local art glass outlet store (http://www.armstrongglass.com/), we found a piece of white and yellow glass we figured would match our bathroom and still be neutral enough to match other rooms (hopefully the cabinet survives long enough to see our next home).
I built a frame around the glass panel and finally finished the cabinet door.
I'm scared about the hinges. But I'll worry about that next week.
Tuesday, July 04, 2006
Adding the Shelf
A shelf is an opportunity to use up scraps. Since I had just enough 1 X 3 left, I decided to join five pieces (and one piece of 1 X 2) to make my shelf for the cabinet side.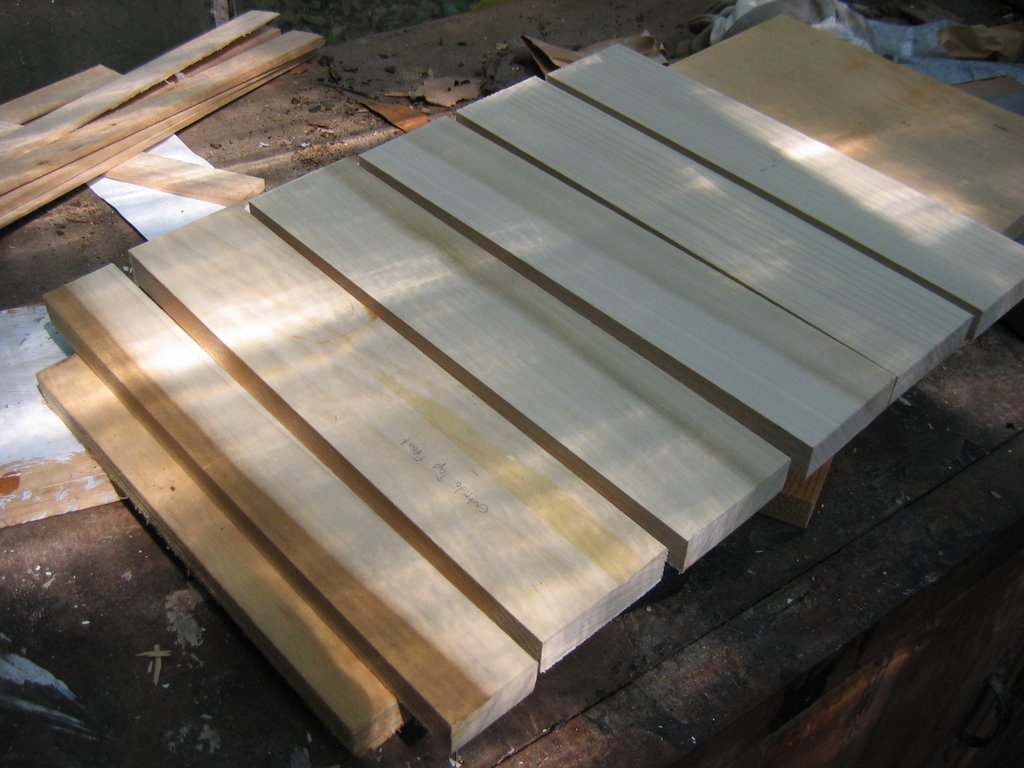
Since I don't have a biscuit joiner, I used my trusty pocket hole jig to join the pieces (and some glue, of course). I mounted the shelf with some simple shelf pins I took from a shelf we weren't using. Easy.


