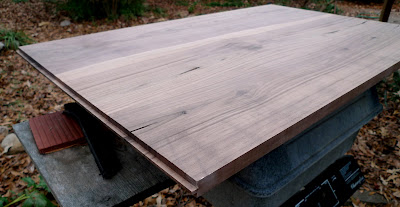
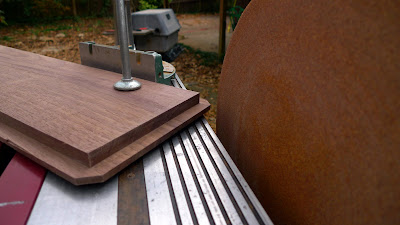
The next step is either to glue the full carcase or shorten the long apron pieces to eliminate the shelf gap. I'm concerned about a gap between the shelf and the legs/side rails. So is Melissa. She thinks they will fill with crumbs and dog hair. The gaps were not intentional, but they probably lend themselves to better wood movement. So I dry fit the shelf between the sides and attempted to set the length between the sides to be what it would actually be. My main purpose here was to see if the gaps on either side of the shelf are acceptable, or if I should shorten my long aprons to eliminate the shelf gaps.
I'll wait until after next weekend because I'll see my brother, Brek. I'll get his opinion before moving forward.
Sunday, December 21, 2008
Wondering About the Shelf Gaps
Posted by
Eric Jacobson
at
2:40 PM
0
comments
![]()
![]()
Labels: Design, Fixing Problems, Woodworking
Glueing-Up The Sides
After some light sanding, I went ahead and glued-up the left side. I used Titebond III glue for the first time. Apparently, it has a longer workable time before it dries; perfect for these carcase glue-ups. The pieces went together well.
So I glued-up the right side as well.
Posted by
Eric Jacobson
at
2:32 PM
0
comments
![]()
![]()
Labels: Woodworking
Saturday, December 20, 2008
To Chamfer or Not to Chamfer
I've never cut chamfers before. Instead, I usually sand the hell out of edges to soften them. But I've always like the modest chamfers on my brother's furniture. While reading the manual for my new Shopsmith jointer, I discovered I can set the jointer fence at 45 degrees and cut chamfers.
Seemed easy enough, so I decided to give it a try. I tried to keep the chamfers on most of the pieces less than 1/16". However, on the legs, I cut them a little deeper. I'm hoping it will give it a nice subtle elegance.
Posted by
Eric Jacobson
at
4:34 PM
0
comments
![]()
![]()
Labels: Woodworking
Finishing the First Shelf
After cutting the ends off with my circular saw, I used my orbital sander, with some 60 grit, to get the planks flat and even. I used my router to make a tongue on both ends. I'll have to remove about two inches of the tongue on all four corners so the shelf will fit within the legs. I know, it's weird but that's what I came up with. I cut slots on the inside of these apron pieces to hold the shelf top in place. I'm already starting to think this may not work. Stuff is never going to fit right.
Posted by
Eric Jacobson
at
4:21 PM
0
comments
![]()
![]()
Labels: Woodworking
Tuesday, December 16, 2008
Clamping the First Shelf
I wanted to join the panels for the coffee table shelf and glue/clamp them together first for two reasons. One, it needs to be completed before I glue-up the carcase because it floats between the sides. Two, I wanted to practice before I tackle the coffee table top. The top has to look good! The shelf is fairly hidden so it doesn't really matter if I screw it up. I had a problem finding a flat surface for the glue-up/clamping. Melissa suggested our dining room table. I took her up on her offer. The water jug and car battery (in the trash bag) are used as weight to hold the shelf slats down as the glue dries; two of the slats would not lay completly flat. I put down paper on the bottom of the slats as a glue barrier from the table. I know I can always sand off the glue that drips out and any paper stuck to it.
Posted by
Eric Jacobson
at
5:01 PM
0
comments
![]()
![]()
Labels: Woodworking
Making the Side Panels
Two sides will be frame and panel. I cut the tongues on the panels with my router. The router slots in the legs were too close to the mortise holes for the top and bottom frame pieces so I had to sand the tongue corners away. The disc sander did this in seconds. Love it!
Posted by
Eric Jacobson
at
4:56 AM
0
comments
![]()
![]()
Labels: Woodworking
Saturday, December 13, 2008
The New Jointer!
Each new project deserves a new tool. This time, I finally added a jointer to my collection. I bought an old ShopSmith jointer off ebay. Utilizing my existing ShopSmith motor alowed me to get a pretty solid jointer, at about 25% the cost of new stand alone jointers. Plus it will save space this way.
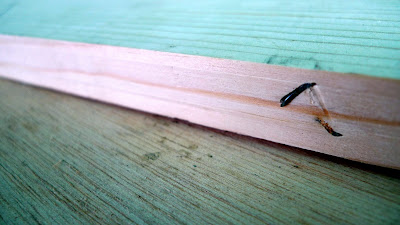
I spent most of the day flipping through the manual, re-aligning all the blades, the fence, and several other pieces. Once it was all ready to go, I turned it on and passed a practice board through. The cuts were impecable. I grabbed another scrap board and passed it through. This one made a weird sound. When I completed the pass I took a look at the edge and discovered a huge staple cut in half. Dumb! I had paid attention to every operational and safety proceedure in the manual. But somehow I forgot to check the board edge for foreign objects. And just like that, I had ruined my perfect blades. Unbelievable.
Fortunatly, I was able to move the fence and use the other end of the blades becaue I only needed to edge join. Boy, did I feel stupid.
Posted by
Eric Jacobson
at
8:27 PM
0
comments
![]()
![]()
Labels: Woodworking
Making Panel Slots with Router
Each coffee table side will have a solid wood panel in a frame. I used the router to slot out the frame in the apron and legs. The slots in the legs were scary to cut because they were so close to the mortises. I also used the router to make the tongues on the two side panels. I love the piles of router shavings and nothing beats the smell. Wonderful!
Posted by
Eric Jacobson
at
8:17 PM
1 comments
![]()
![]()
Labels: Woodworking
Careful Mortise Measurements
The mortises on the legs are trickier to cut (drill) than those on the apron pieces. But somehow I managed to get through them. I'm sure there is a mistake that just hasn't surfaced yet. In the end, I had to measure and drill out 48 different mortises...ridiculous!
Posted by
Eric Jacobson
at
8:05 PM
0
comments
![]()
![]()
Sunday, December 07, 2008
Mortise and Tenon Depth Oversight
Most of my coffee table joinery will be floating mortise and tenons. But I'll cheat and make them using the BeadLOCK system. Today I made the easy mortises; on the apron pieces.  I discovered an oversight in my design. I had the aprons too close to the same corner of each leg. I had not accounted for the depth of each tenon. The only fix I could think of was to make my tenons shallower and move my front and rear aprons further from the corner. This little oversight may mean I don't have enough wood for the shelf. Right now, I'm too lazy to come up with a solution. Considering I don't really have a choice, I'll deal with it later. Worse case, I buy another board. More likely I'll just come up with another design for the shelf. Darn.
Posted by
Eric Jacobson
at
5:02 PM
0
comments
![]()
![]()
Labels: Design, Woodworking
Examining the Grain
After picking out wood at the lumber yard based on how clean and straight it was, and cutting the pieces to maximize my purchase, there is still a challenging and important decision left to make. Now that I'm left with the pieces I cut out, I have to decide where to use them, which side to show to the humans who enjoy it, and how each piece will play nicely with each other piece.
Each piece has four choices by itself; two sides and two orientations. These four choices compound as I match each piece with each other piece. It all comes down to the grain. A woodworker with more experience can make these decisions better and with more criteria. I have a few basic things I look for.
I want my straight and tightest grained pieces used in areas I can't tolerate warping. But the cosmetics are sometimes tougher. I want the curves of the grain to frame certain areas of the coffee table. I want the curves to help circle the outside of it, helping us look toward the center. This will have a large effect on how the finished table looks. The pieces of wood should help trick the eyes into thinking they fit together nicely.
Whatever choices I make now, I'll be stuck looking at for the rest of my life.
Posted by
Eric Jacobson
at
4:29 PM
0
comments
![]()
![]()
Labels: Woodworking
The Joys of Disc Sanding
Melissa got me a new 12" steel sanding disc for my Shopsmith. It was to replace the disc I bent last year during a screw up.
Man, what a great tool. I used a fence and the quill feed to duplicate exact lengths for all my apron pieces. If one piece is off it could make the whole glue-up a real nightmare.
 The second thing I used the disc sander for was to remove all the saw blade marks from my ripping. I mounted the fence at a slight angle and passed the boards through so they would meet the sanding disc on its down turn. Two passes and no one would ever know how dull my rip blade is!
Posted by
Eric Jacobson
at
4:07 PM
0
comments
![]()
![]()
Labels: Woodworking
