
 After lots of glue and creative clamping I finally got four legs. Each leg is actually eight pieces of wood glued together! I used the power sander and a variety of sand paper grits to blend each eight-piece chunk into something that will look like a solid leg when painted.
I'm a little worried that the leg style will not fit the cabinet style...we'll see. Next, I have to build a shelf on the cabinet side (right side), build the cabinet door, and attach the door and legs. Seems simple, but I'm sure it's not.
Thursday, June 29, 2006
Making the legs - Part 2
Sunday, June 18, 2006
Making the legs - Part 1
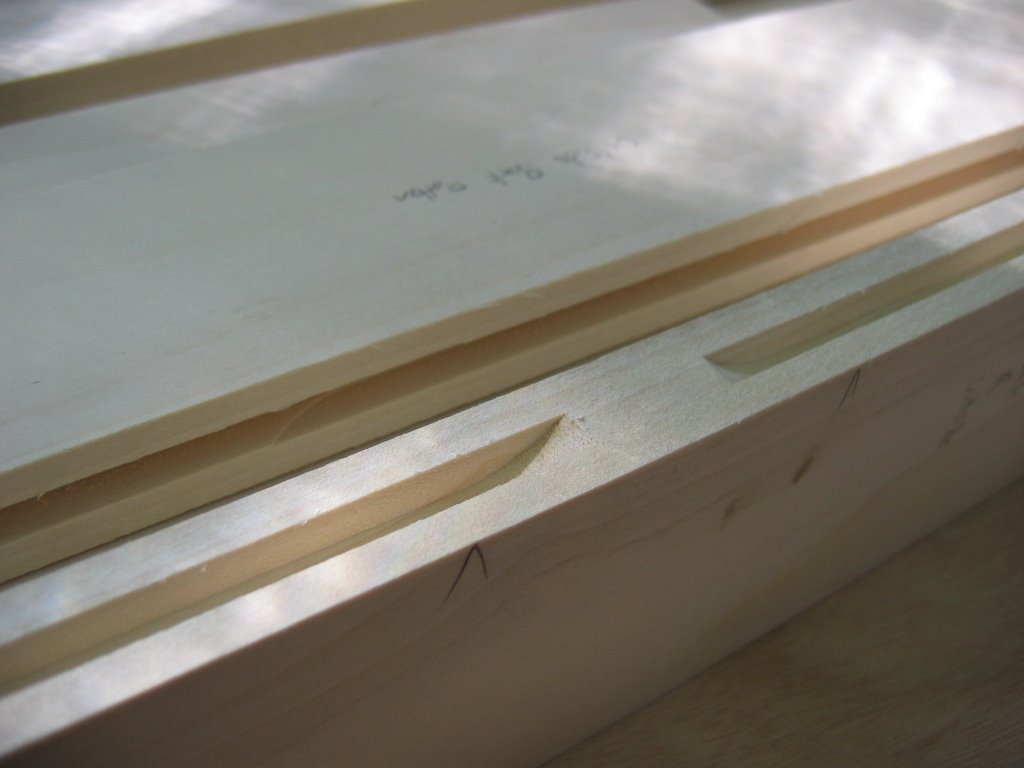
After being pleased with the tile work Melissa and I managed to perform on the bathroom floor, I didn't want to cover it with a cabinet. So I decided this cabinet would need legs high enough to still enjoy the floor below it. One thing my brother's cabinets have definitely influenced me on is that legs can be an important part of a cabinet. Beyond just sturdy support, they can make a big cosmetic impact.o I decided to make some beefy legs with a slight taper. I picked up some 3’ 2 x 2 poplar pieces from Lowes (which are actually just 1 x 2s glued together). I cut each 2 x 2 in half and will glue 4 pieces together to make 3 x 3 legs. The problem is, my circular saw won’t cut a 3” thick piece of wood. This means, I’ll have to cut my two tapered pieces before I glue everything together.
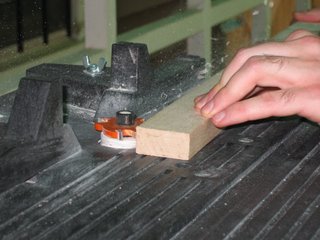
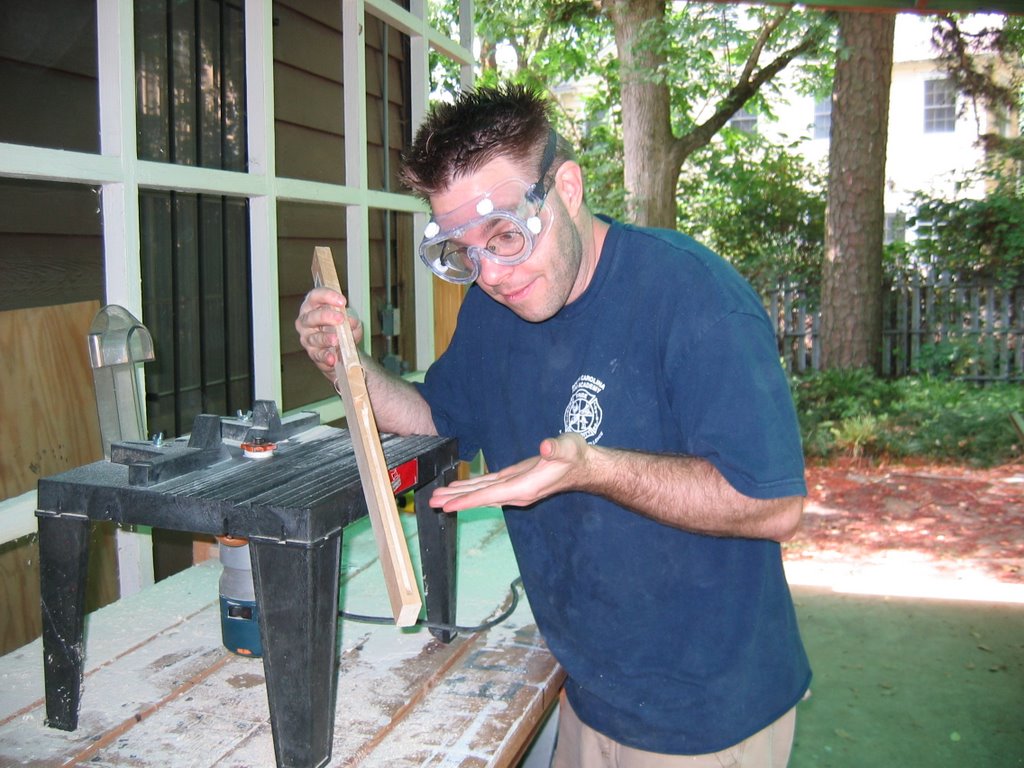
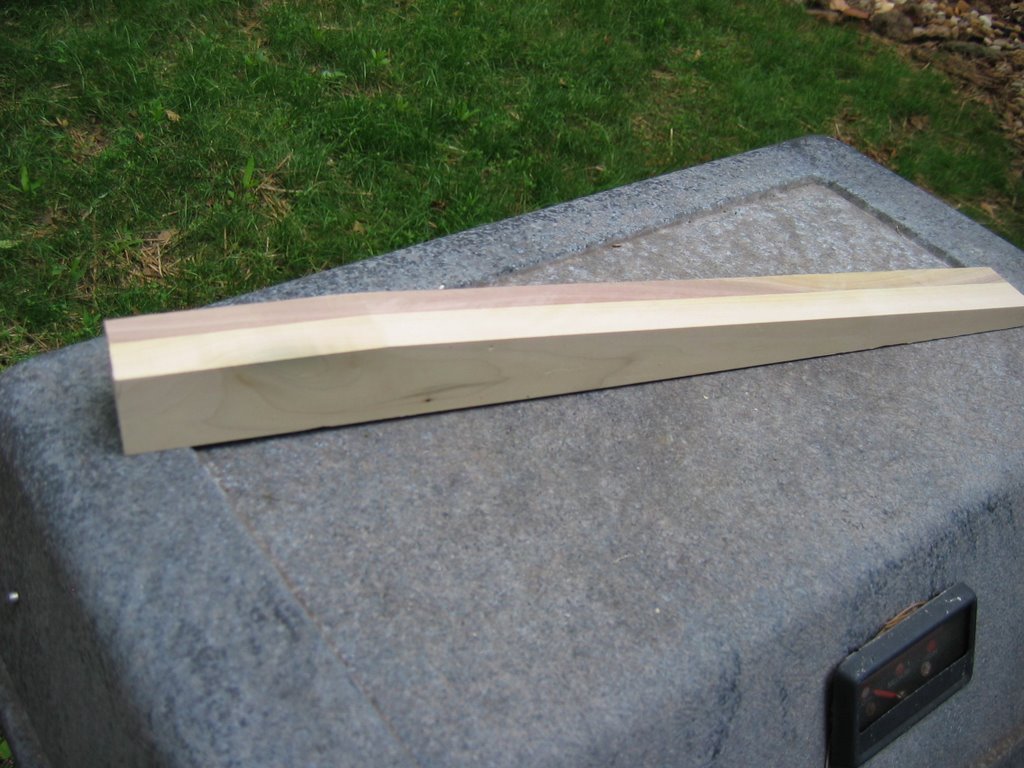 Okay, so how do you rip a taper into a 2 x 2 with a circular saw guide? Here’s how I did it. I made a couple of counter-sunk screw holes in my guide and I actually screwed the guide directly to the piece I ripped (see picture below). This was the only way I could figure out how to keep the wood from slipping beneath the guide during the rip. One of the joys of paint-grade work is that holes can be filled and hidden. Dude, it worked beautifully.


Adding the Drawer Faces
Here's a cool trick my dad taught me (...well it is Father's Day). How on earth do you attach the drawer faces to the drawer boxes and leave a perfect 1/16" space between each drawer front and the cabinet carcase? Easy, stick a couple nickels under the drawer face, put some double-sided tape on the front of the drawer box, and voila...just push the face against the drawer box on top of the nickels. The tape keeps the face in place as you pull the drawer out to drill the two together. Since nickels happen to be exactly 1/16" thick, you've got yourself the perfect spacer.
I would like to say it was a piece of cake, but unfortunately my vertical cabinet sides are not exactly vertical. So I had a lot of fine tuning to do as I cut the drawer faces. Nevertheless, the nickel trick helped tremendously.
Sunday, June 11, 2006
Adding the Top
Adding the cabinet top was refreshing after spending most of 2 days on the drawers. The top went on easily with a 1/4" piece of plywood framed by four 1/2" X 2" edge boards. I opted for butt joints rather than the typical mitered corners. Mitered corners never fit and seem more prone to chipping.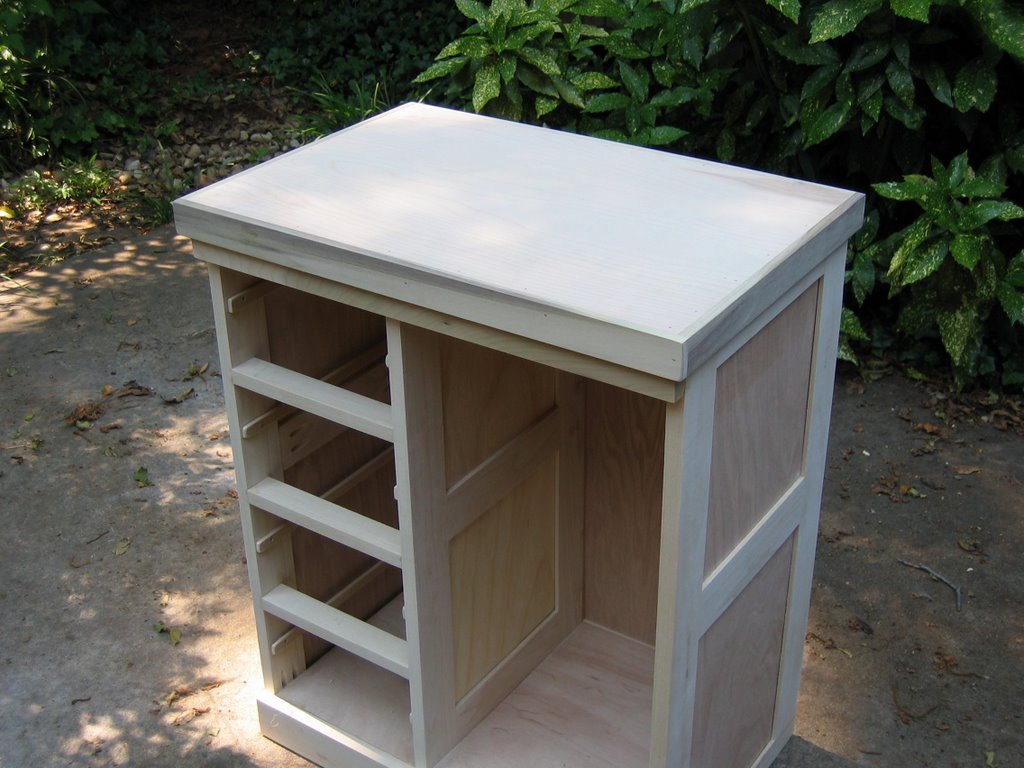
Besides, my hand-miter saw makes straight cuts so nice that the end grain looks great.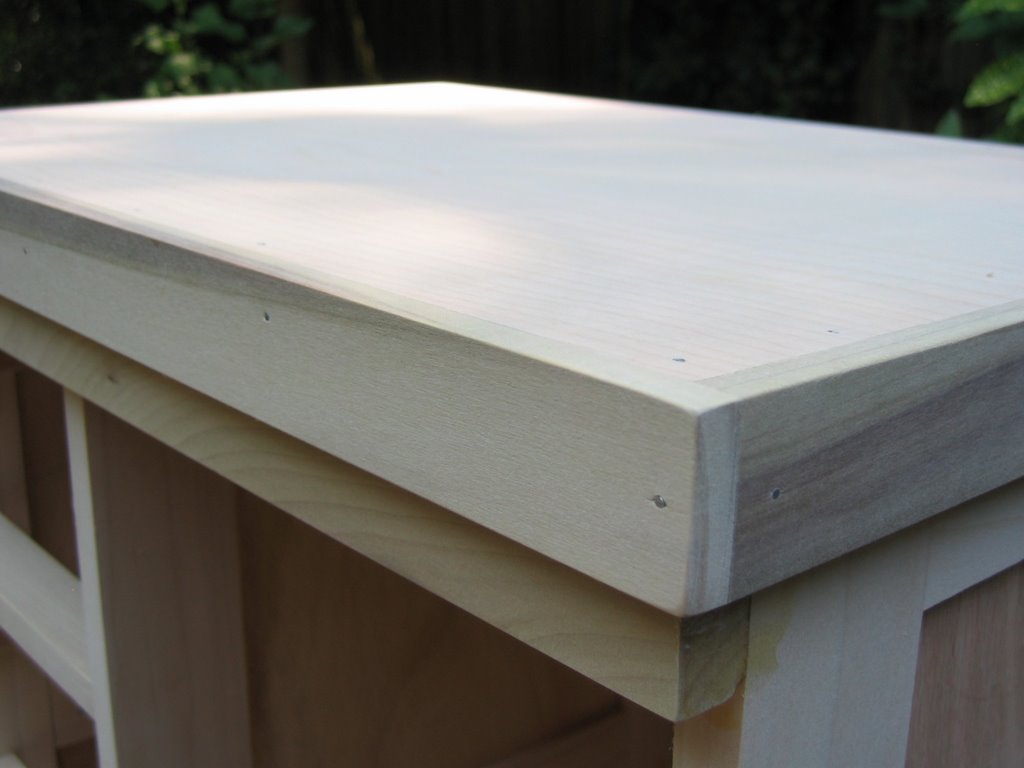 It's starting to look like something. Next, I need to build the cabinet door and legs.
Glueing the Drawer Cases
With all these dainty litte 1/4" and 1/2" pieces, getting the drawer cases square during the glue-up is a challenge. I added brads to keep the pieces together while the glue dried and used my square to keep them square. The picture below shows the drawer backs, which I cut to extend an inch above the sides. This will be my attemp at drawer stops (to keep the drawers from falling out of the cabinet when opened). While the glue dried, I assigned a drawer to each cabinet opening and began measuring the position of the slides. I drilled a hole big enough for the screws to slip through the slides to ensure the slides would fit close against the cabinet sides. I also counter-sank the holes so the screw heads wouldn't conflict with the drawer grooves.
 Attaching the slides to the correct place proved to be harder than expected. If they didn't line up exactly with the drawer grooves, the drawer would not slide in/out. When possible, I flipped several slides 180 degrees to realign using different screw holes. When not possible, I cheated by using the router to carve out wider grooves. I also discovered I had to rout out the grooves in the back of the drawer sides to open wider. This was the only way I could get the drawers to fit into their openings with my huge stops. A final problem was the clearance between each drawer side and the cabinet. During my measuring I decided to error on the side of leaving too much clearance between each drawer side and the cabinet. Which was good, because I used washers between the slide and cabinet (for about 50% of my slides) to close the gap between the drawer side grooves and slides. A 1/16" gap is shown in the picture above. Sometimes I used up to 3 washers. In the end, all 4 drawers fit perfectly. I'll have to make the drawer faces later.
My only complaint is that the drawers tip down when fully opened. This occurs because of the expanded grooves near the back of the drawer sides. I guess it was a trade off between being able to get the drawers in and out of the case and having drawer stops. I'll figure out a way to fix this later.
Saturday, June 10, 2006
Building the Drawers
I hate building drawers. It takes FOREVER! And typically it's not very rewarding because most people just look at the drawer front and say "cool, a drawer". Building a drawer is like building the case for the entire cabinet. And the worst part is, you usually have to do it multiple times. For this project, it's four times for me.
I decided to use 1/2" poplar for the drawer sides and front. I'll use 3/4" poplar for the face. The drawer back and bottom will be 1/4" plywood attached using slots. After staring at two scrap pieces for quite some time, I finally decided to cut a dado and rabbet to attach the front and sides.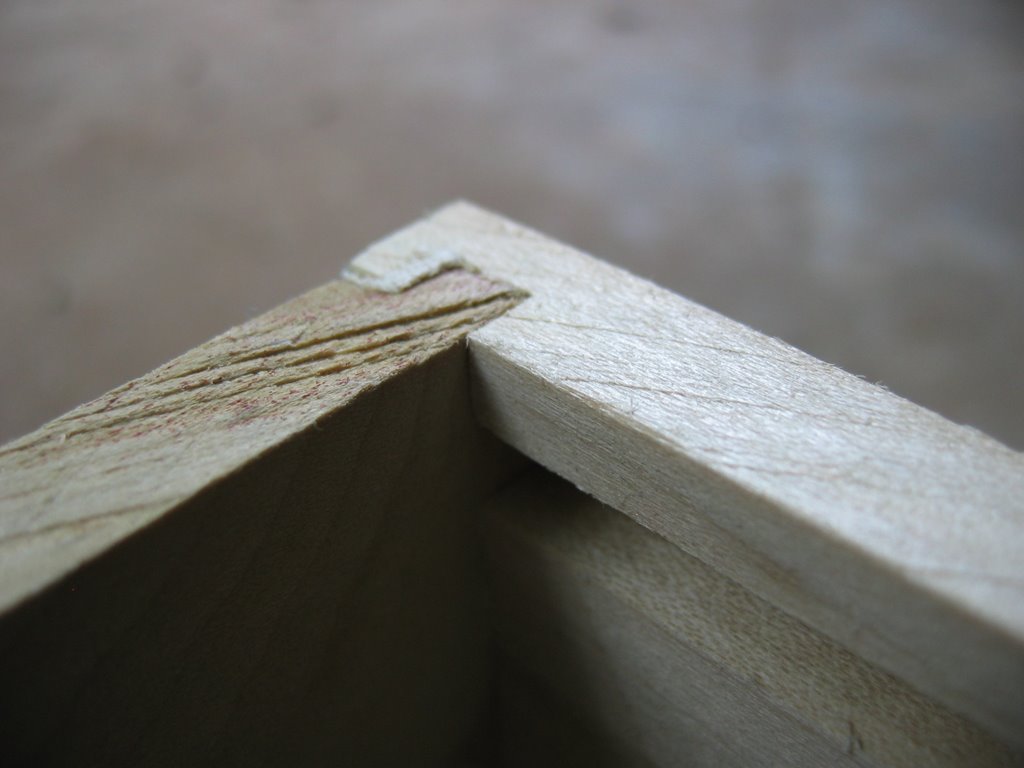
Next, I struggled through the tedious work of cutting and routering all eight drawer sides and fronts.
Finally, I routed the drawer side grooves for the slide.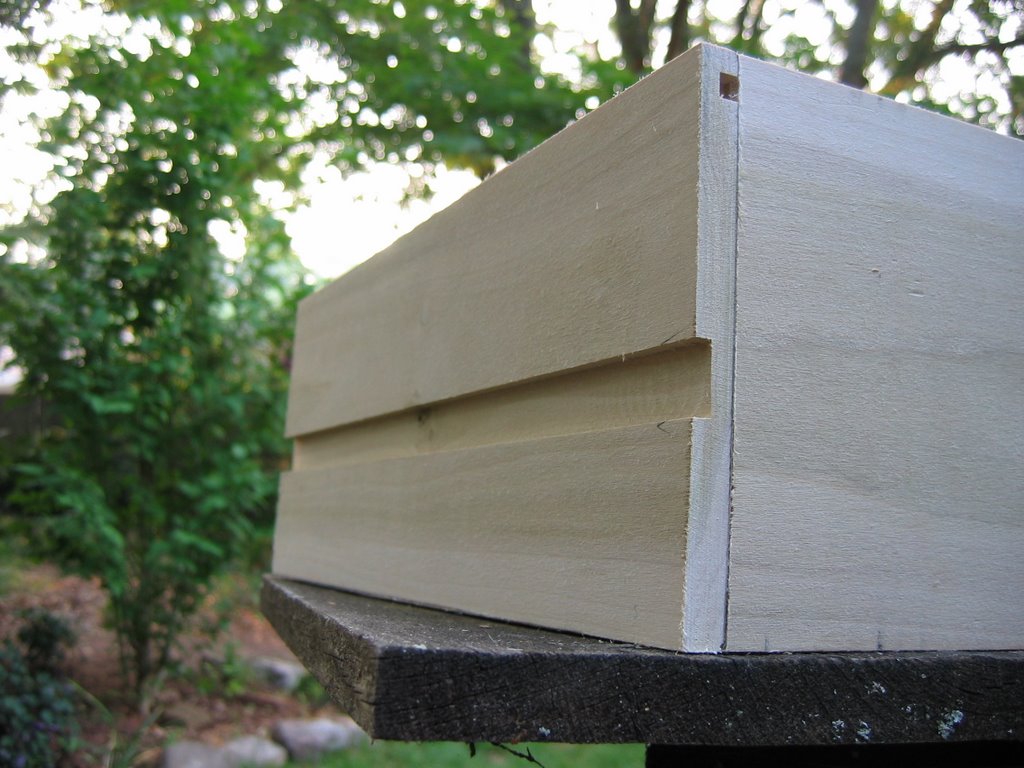
Hopfully tomorrow morning I'll cut the drawer bottoms and backs, glue up the drawers, and discover that they actually fit in the case.
Supporting the Drawers
It turns out, manufactured drawer glides less than 16" are not easy to find. No problem. I've always wondered how hard it is to make them myself. I decided to make side mount slides made out of 1/4" poplar. These will be attached to the case sides with screws, in case I need to replace them and to reduce the wood expansion problem. This helped me determine that the drawer sides must be at least 1/2" thick because I would have to cut grooves in them for the slides. The main reason I wanted to use the slides is to prevent the drawers from tipping down when opened.
Since I don't have a table saw, I was a little concerned about ripping the slides. I needed the slides to be about 3/4" high because that's the size of the router bit I would use to cut the drawer side grooves. Fortunatly, my circular hand-saw guide did the trick and I ended up with eight slides. Next, I decided divider rails would be necessary to help support the drawers and allow me to add some kind of stop. The added these with pocket holes and glue, though I had to devise a method of screwing in the pocket screws with a rachet because my drill didn't fit.
Sunday, June 04, 2006
Glueing up the Carcase
The first milestone came when it was time to glue up the cabinet carcase. I discovered two oversights and determined a way to correct one. My middle wall had a 1/4 " gap between it and the back panel. I corrected it by shoving a scrap 1/4" poplar piece in the gap. It will be hidden behind my drawer boxes (for the most part).
The second oversight is that my frame and panel side walls are set lower than I planned for. This leaves a gap on each side. One will be hidden behind a drawer box. However, the other will be visible inside the cabinet door side. I'll figure out a way to fix it later.
The rest of the glue up went smoothly. I experienced the typical frustration, where glue is dripping all over my project and hands. Luckily, I can sand and paint everything, so I'm not real concerned. Cool. And now I've got a carcase for the drawers and door.
Next, I'll build the drawers and hope I can obtain some drawer glides that fit and have places for screws that happen to line up with my panel frames...yeah, right. Was I suppsed to plan for this? Yikes.
Saturday, June 03, 2006
Building the Frame and Panel Pieces
I used my router to cut 1/4" deep slots in the framing pieces.

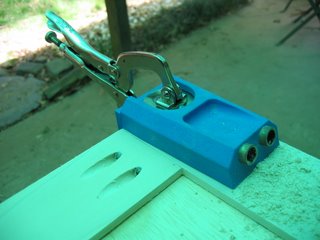
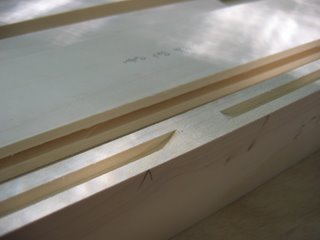 Rather than cutting tenons for the framing pieces, I used butt joints. Where hidden, my Kreg pocket hole jig cuts holes so screws can hold the joints closed while glue dries.
The panels were cut from 1/4" birch plywood. I don't have a table saw. Instead, anything that is too big for my hand-miter saw gets cut with my circular hand-saw and guide. The guide is great. I can line it up with my pencil marks and get a nearly perfect cut.

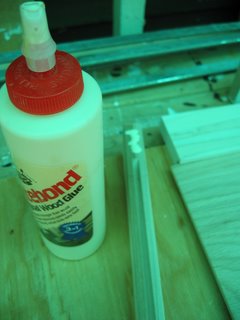
My brother, Brek, once told me that wood glue is so strong that if two pieces of wood are glued together end-to-end, the pieces of wood will break before the joint. I choose to rely on this theory heavily because it makes joinery all the easier. I love glue.
When I can't use pocket holes (because of visibility) I use my Jorgenson clamps, which are good enough for me.

One problem with butt joints is they never seem to set exactly where you want them. So after the glue dries I put 60 grit sand paper on my power sander and sand them flush (shhhhhh, nobody will ever know).

And eventually, I have some frame and panel pieces...


 Rather than cutting tenons for the framing pieces, I used butt joints. Where hidden, my Kreg pocket hole jig cuts holes so screws can hold the joints closed while glue dries.
The panels were cut from 1/4" birch plywood. I don't have a table saw. Instead, anything that is too big for my hand-miter saw gets cut with my circular hand-saw and guide. The guide is great. I can line it up with my pencil marks and get a nearly perfect cut.

My brother, Brek, once told me that wood glue is so strong that if two pieces of wood are glued together end-to-end, the pieces of wood will break before the joint. I choose to rely on this theory heavily because it makes joinery all the easier. I love glue.

When I can't use pocket holes (because of visibility) I use my Jorgenson clamps, which are good enough for me.

One problem with butt joints is they never seem to set exactly where you want them. So after the glue dries I put 60 grit sand paper on my power sander and sand them flush (shhhhhh, nobody will ever know).

And eventually, I have some frame and panel pieces...

Getting Started
Design? Well, I don't really have one. I wrote down some sketches on a piece of paper but I lost it. I basically decided on a footprint and cut an old scrap piece of 1/2" plywood to be the bottom of the cabinet. I also came up with a design that would maximize space by letting the legs be inside of the footprint. This way I can butt the cabinet against a wall and the base molding will not conflict with the cabinet legs.
So my plan was to build a cabinet carcase using frame and panel pieces instead of solid wood or plywood sheets. I think this will make it look better and weigh less. Since I don't have a planer or the patience to use a hand plane, I have to buy dimension lumber. I picked up a bunch of 1x2 and 1x3 poplar pieces from Lowes. I picked poplar because it is the cheapest hardwood and I knew I would be painting this cabinet (so the wood doesn't have to be pretty).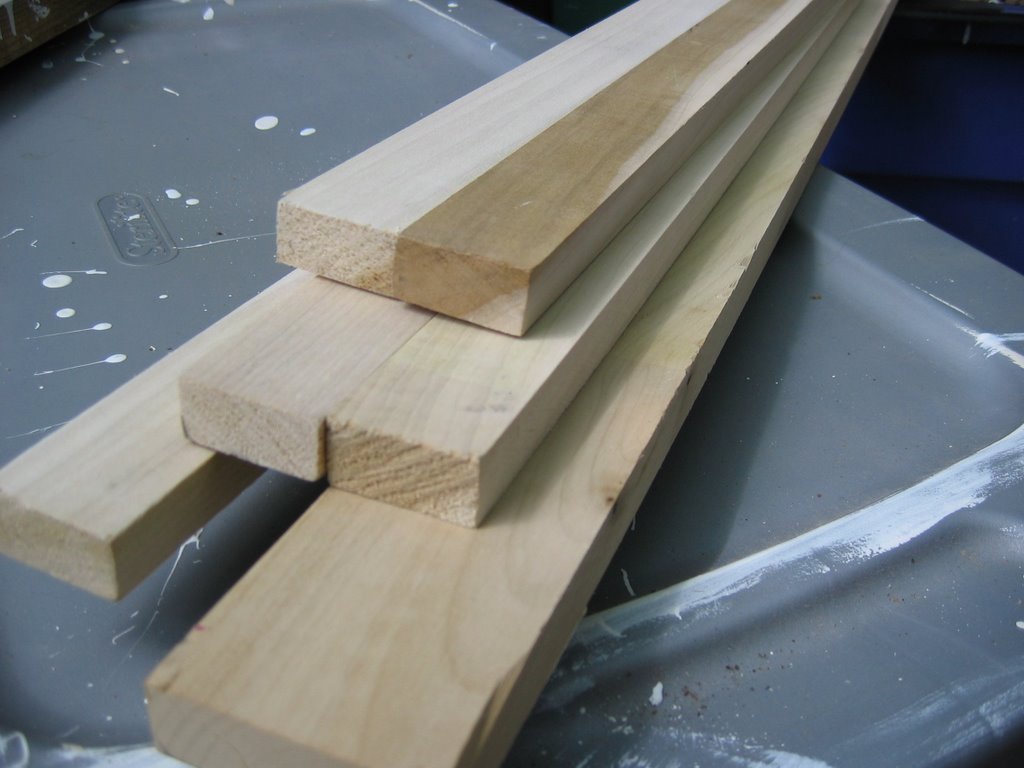
I started by cutting the lumber. I use my Swedish miter hand-saw, when possible, because it cuts more accurate than my miter power-saw.
Thursday, June 01, 2006
Mission #1: The Bathroom Cabinet
My mission? To build the perfect cabinet for the bathroom I just rennovated.
I have a few constraints, however:
Unlike my brother, Brek, who builds museum quality furniture, I devote a minimum of skills and tools to my woodworking projects. I'm fond of simple joinery like butt joints with lots of glue. My favorite tools are my Kreg pocket hole jig (essential for every good screw reinforced butt joint) and my Porter Cable power sander (essential for every mismatched joint and poor measurement). I also have a strict time constraint because I have many other hobbies competing for my free time.
What is this cabinet for? It needs to sit in the corner of our bathroom, against a knee wall, between a toilet and full length mirror. It will store bathroom stuff like toilet paper, poison ivy ointment, and extra soap.
Subscribe to:
Posts (Atom)

